| Corner Balancing |
|
| Written by Ken Huey | |||
| Saturday, 17 April 2010 07:59 | |||
Preparation to weighing your car
Weighing the car
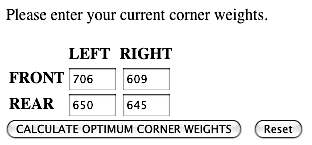
You can enter corner weights here http://944spec.org/cornerbalance to solve for optimum cross weights. It will present a screen for you to enter your corner weights.
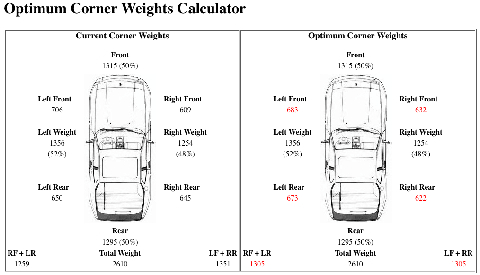
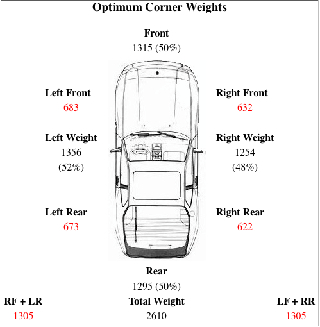
In this example we enter the values of 706 for the left front, 609 for the right front, 650 for the left rear, 645 for the right rear and then click on the CALCULATE OPTIMUM CORNER WEIGHTS button. It will then output a screen similar to the picture below.
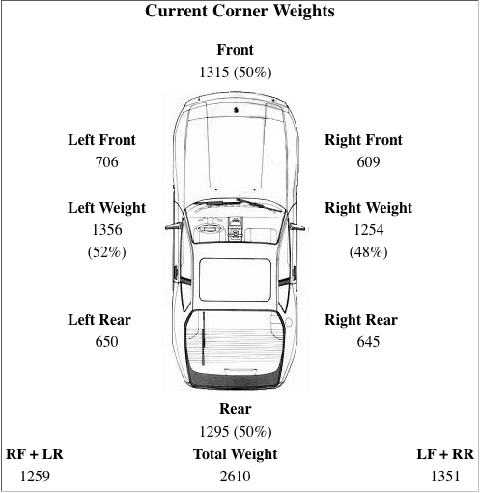
Let's look at the left hand image (current corner weights) a little more closely.
You'll notice in this example that there is a 92 lbs difference between the Right Front + Left Rear cross weight vs. the Left Front + Right Rear cross weight. This would make handling characteristics between left and right turns different, i.e.- this car might have a slight oversteer on left hand turns and a slight understeer on right hand turns. It would be nice to get the cross weights as close as possible to keep handling balance similar between left and right turns. You'll also notice our cars are very well balance front/rear. The left side weight is heavier because we have the weight of the driver, the race seat, harnesses, etc. on the left side. If you are light enough to be able to add ballast to the right side then do it for better left/right static weight balance. It would be ideal to get the left side static weight to 50% by taking out weight on the left side and/or adding ballast to the right side but that would be near impossible given the limits of our class rules since we also want to be as light as possible and close to the 2600 lb. minimum class weight limit with driver. The best we can do is solve for cross weight.
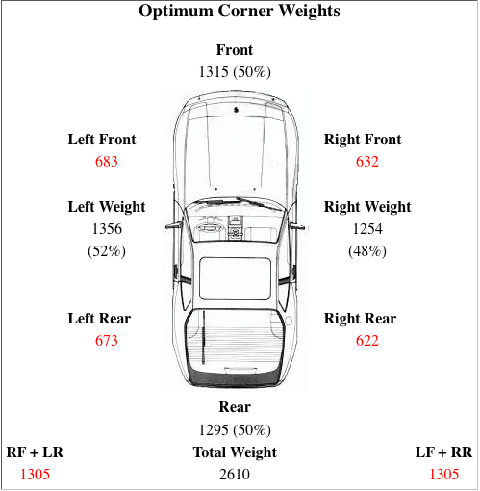
Adjusting Corner WeightAdjusting the ride height on any corner changes the cross weight percentages. You can't actually move static weight around by ride height adjustment because the front/rear and left/right weight will still be the same, you're just adjusting the weight distribution on a corner. From the previous output the data on the right is the calculated optimum corner weights to achieve equal cross weights.
In this example the initial left front was 706 lbs, the initial right front was 609 lbs. The corner weights calculator want us to change the left front to 683 lbs and the right front to 632 lbs. So we want to decrease the left front by (683 - 706 = -23) 23 lbs and increase the right front by (632 - 609 = 23) 23 lbs. Given the ride heights we wrote down earlier, we can either lower the left front or raise the right front or more likely a little of both to keep the ride height even. Repeat till you achieve the target corner weights and then tighten the collar ring(s).
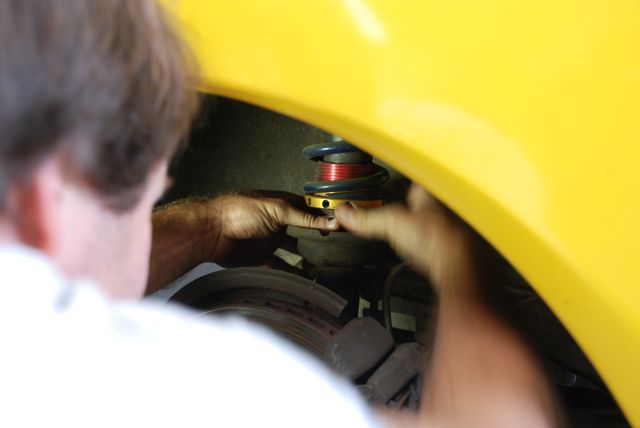
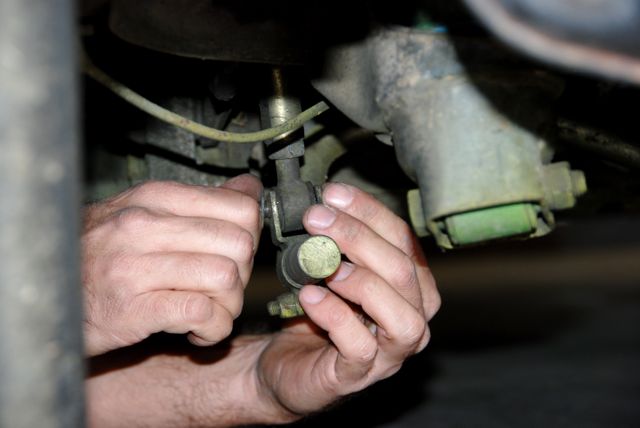
Adjusting Sway bar PreloadAfter you have finish your corner balance adjustment and the car is on the ground it is time to reconnect your front and rear sway bars. With the driver weight still in the car adjust your drop link until the connecting bolt easily goes through the connector hole, the drop link end and out the other side of the connector hole without binding.
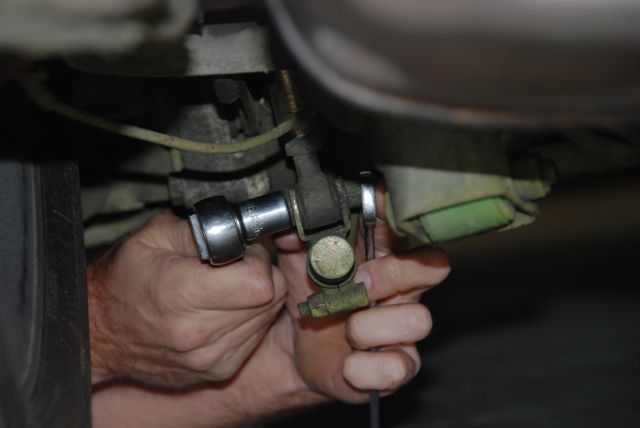
Tighten the nut.
If you started with the rear sway bar, do the same for the front sway bar to adjust the preload and then tighten.
That's it for the scope of this article. * Special thanks to Rick Lofgren who gave a corner balancing seminar on one of our of work on cars day and the basis for this article.
Link to Corner Balancing Program
|